Common Vapor Barrier Installation Mistakes: A Forensic Guide
The integrity of the modern building envelope is fundamentally a struggle against the invisible. While liquid water is easily identified and redirected through mechanical flashings and gravity-fed drainage planes, water vapor operates on the level of molecular pressure. In the North American construction landscape, the “vapor barrier”—more accurately termed a vapor retarder—is often the most poorly understood component of the assembly. Common Vapor Barrier Installation Mistakes. It is frequently treated as a secondary liner, a plastic sheet stapled to studs with little regard for the hydrothermal physics governing the movement of moisture from warm to cold environments.
The consequences of this misunderstanding are catastrophic and largely hidden. When vapor management is executed incorrectly, the structural members of a home are subjected to “interstitial condensation.” This occurs when moisture-laden air reaches its dew point inside the wall cavity, liquefying against cold sheathing or studs. Because modern homes are increasingly airtight and highly insulated, the “drying potential” of these assemblies has plummeted. A wall that cannot dry is a wall that will eventually succumb to fungal decay, losing its structural capacity long before the building’s intended lifespan.
This study provides a definitive framework for navigating the complexities of vapor control. We move beyond the rudimentary “plastic on the warm side” advice to analyze the systemic drivers of moisture failure—from the role of “vapor drive” in cooling climates to the impact of solar-driven inward vapor movement. By deconstructing the variables of “perm ratings” and material permeability, we establish a methodology for the architectural stewardship of the home. This is an examination of the residence as a pressurized vessel, engineered to remain dry through the intelligent regulation of molecular diffusion.
Understanding “common vapor barrier installation mistakes”
In the professional architectural and building forensic spheres, the mandate to avoid common vapor barrier installation mistakes is regarded as an exercise in “Permeability Calibration.” It is a multi-perspective challenge that requires the specifier to reconcile the local climate’s vapor drive with the drying capacity of the wall. A common misunderstanding among observers is that a vapor barrier should be a “perfect” seal. In reality, an overly aggressive vapor barrier—such as a 6-mil polyethylene sheet used in a hot, humid climate—can trap moisture inside the wall, leading to mold growth on the back of the drywall as the exterior humidity drives inward toward the air conditioning.
Oversimplification risks are highest when vapor barriers are confused with air barriers. While a material can serve both functions, the mechanics are distinct. Air barriers stop the “bulk” movement of air through gaps, while vapor barriers slow the “diffusion” of moisture through the material itself. Effectively identifying common vapor barrier installation mistakes for a specific project requires a calculation of the “Vapor Profile.” This involves determining if the assembly is “vapor-open” to the exterior, the interior, or both. Failure to provide a drying path is the primary driver of premature structural failure in high-performance construction.
Furthermore, a sophisticated approach must address the “Solar-Driven Vapor Drive.” In many North American climates, wet reservoir claddings—such as brick or stone—absorb rainwater. When the sun hits the wet brick, it drives moisture into the wall with immense pressure. If a vapor barrier is placed on the wrong side of the assembly, this moisture is forced into the insulation and trapped against the framing. Achieving a resilient envelope requires a shift from “blocking moisture” to “managing moisture cycles.”
Systemic Evolution: From Breathable Lath to Vapor-Closed Assemblies
The history of vapor management is a transition from “Accidental Breathability” to “Engineered Enclosure.” In the early 20th century, homes were essentially uninsulated. The heat from the interior would move freely through the walls, keeping the structural members warm and dry. The First Age (Pre-1950s) was defined by these “energy-leaky” but “moisture-safe” systems.
The Second Age (1970–2000) introduced mass insulation without a sophisticated understanding of dew points. This era saw the introduction of the “Polyethylene Blanket.” The logic was simple: keep the moisture out of the wall. However, this often ignored the fact that moisture always finds a way in, whether through a plumbing leak or an air bypass. This era was defined by the “Musty Home” syndrome, where moisture trapped by plastic led to hidden rot.
We are currently in the Third Age: The Age of “Smart Permeability.” This era is defined by materials that change their permeability based on the surrounding relative humidity. Today, we utilize “Smart Vapor Retarders” that block vapor in the winter (when indoor air is dry) but “open up” in the summer to allow the wall to dry toward the interior. We have moved from static barriers to adaptive membranes that facilitate the “Hygrothermal Pulse” of the building.
Conceptual Frameworks and Mental Models
To evaluate vapor systems with editorial and technical rigor, professionals utilize specific mental models:
-
The “Molecular Pressure” Model: This views vapor as a gas seeking equilibrium. Vapor moves from areas of high concentration (hot/humid) to low concentration (cold/dry). The barrier’s job is to slow this “pressure equalization” to a rate the wall can handle.
-
The “Drying Buffer” Framework: This treats a wall as a battery that can hold a certain amount of moisture safely. The vapor barrier must be calibrated so that the “wetting rate” never exceeds the “drying rate” over an annual cycle.
-
The “Cold Surface” Logic: This recognizes that vapor is harmless until it hits a surface colder than the dew point. The strategy is either to keep vapor away from cold surfaces or to ensure those surfaces are kept warm (through exterior insulation).
-
The “Perm-Rating” Gradient: A mental model that dictates the wall should generally become more permeable as you move toward the “dry” side of the climate’s dominant vapor drive.
Key Categories: Classes of Retarders and Material Trade-offs
When practitioners evaluate common vapor barrier installation mistakes, they typically segment the market by “Class,” which is determined by the material’s perm rating (grains of water vapor per hour, per square foot, per inch of mercury).
Comparative Taxonomy of Vapor Management Systems
| Class | Perm Rating | Primary Materials | Typical Use Case | Trade-off |
| Class I | < 0.1 | 6-mil Poly, Foil | Very Cold Climates | Zero drying potential |
| Class II | 0.1 – 1.0 | Kraft Paper, VR Paint | Standard North US | Hard to seal at edges |
| Class III | 1.0 – 10.0 | Latex Paint, Plywood | Hot-Humid / Mixed | Allows some wetting |
| Smart | Variable | Polyamide Films | High-Performance | High material cost |
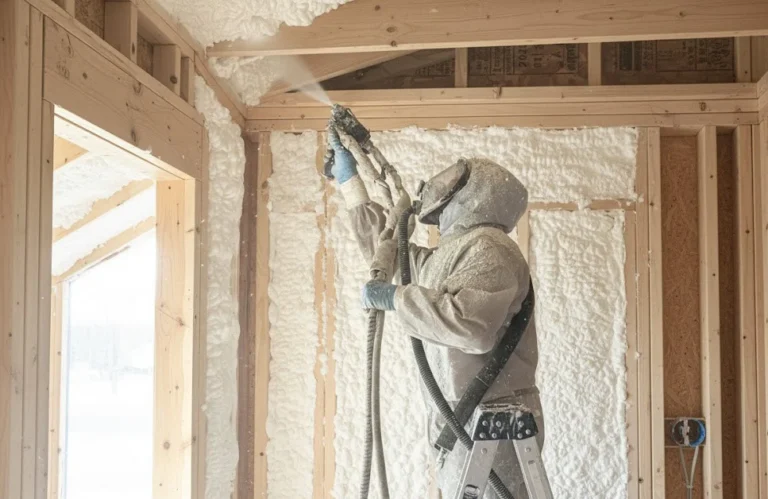
| Integral | Variable | Closed-Cell Spray Foam | Retrofits / Hard-to-Reach | Permanent; difficult repair |
Realistic Decision Logic
The decision to utilize a specific category is often a function of “Climate Zone Calibration.” In the extreme cold of Canada (Zones 7-8), a Class I barrier is often mandatory to stop the massive outward vapor drive. However, in a Mixed-Humid climate (Zones 4-5), the logic favors a Class II (Kraft Paper) or Smart Retarder. These materials provide enough resistance to prevent winter condensation while allowing the wall to dry during the summer humidity.
Detailed Real-World Scenarios and Decision Logic Common Vapor Barrier Installation Mistakes
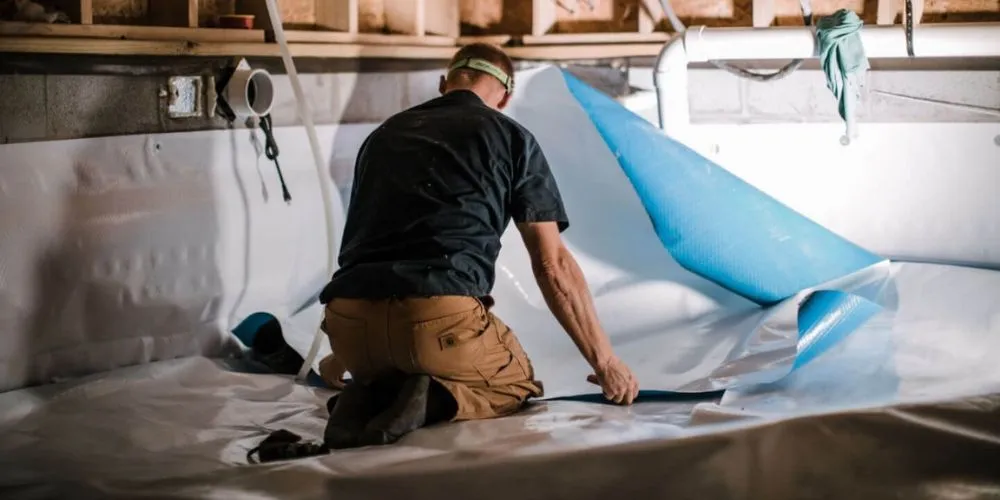
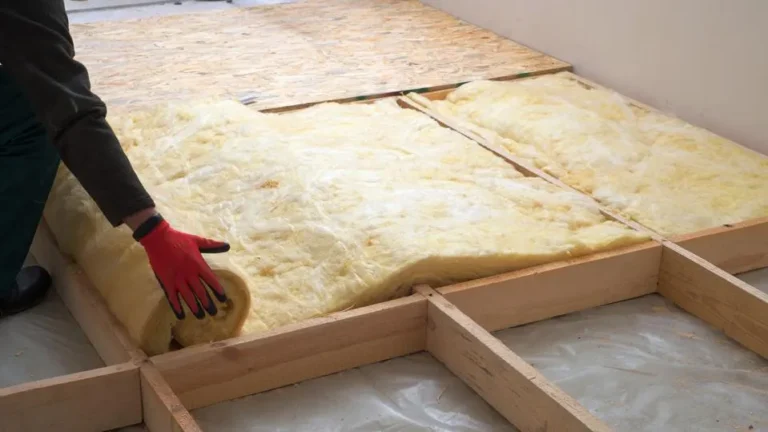
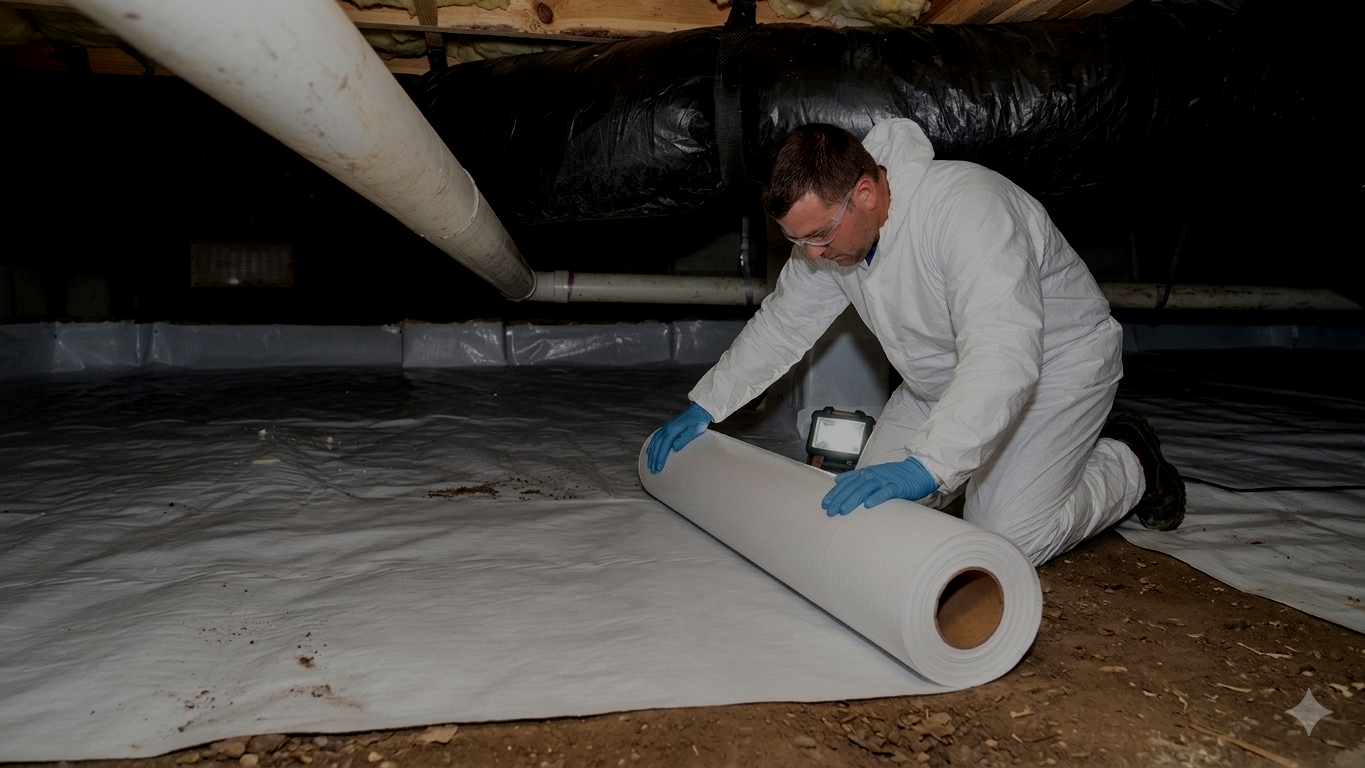
The Basement Retrofit (Northeast)
-
The Challenge: Insulating a concrete wall that is constantly wicking moisture from the earth.
-
The Strategy: Avoid the “Poly-Wrap” mistake. Use rigid foam (XPS) as a vapor retarder against the concrete, followed by a stud wall with no interior plastic.
-
The Logic: Polyethylene on the interior of a basement wall creates a “moisture sandwich” against the concrete. Rigid foam slows the vapor but allows the wall to dry slightly toward the interior, preventing the studs from rotting.
The Hot-Humid Coastal Build (South)
-
The Challenge: Exterior humidity is high year-round; the interior is air-conditioned.
-
The Strategy: A Class III (Vapor-Open) interior finish. No vinyl wallpaper or polyethylene.
-
The Logic: The dominant vapor drive is inward. If an impermeable layer is placed on the interior, the hot, humid air will drive through the wall and condense on the back of that layer, leading to catastrophic mold behind the wallpaper.
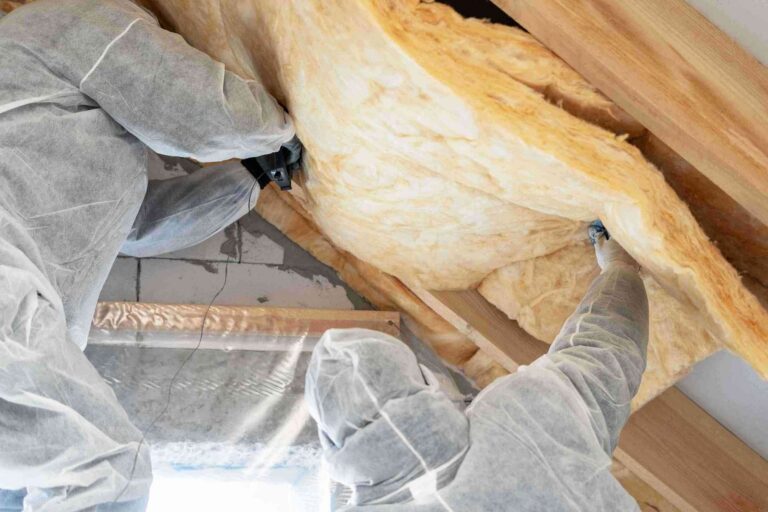
The High-Altitude “Double-Stud” Wall
-
The Challenge: A 12-inch wall filled with cellulose in a cold climate.
-
The Strategy: A “Smart” vapor retarder on the interior face of the studs.
-
The Logic: Thick walls have very little “heat loss” to keep the exterior sheathing warm. The smart retarder prevents winter moisture from entering the deep cavity but allows the thousands of pounds of cellulose to “breathe” out toward the interior during the spring thaw.
Planning, Cost Architecture, and Resource Dynamics
The economic profile of vapor management is defined by “Installation Precision.” The material cost of polyethylene is negligible, but the “Cost of Error” is the highest in the construction industry.
Range-Based Resource Allocation (Per 2,000 Sq. Ft. Envelope)
| Component | Code-Minimum (Poly) | Professional (Smart) | Forensic “Best” Plan |
| Membrane Material | $250 | $1,800 | $2,500 (Smart + Tapes) |
| Sealant & Taping Labor | $200 | $1,200 | $2,000 (Detailed Seal) |
| Air Sealing Prep | $100 | $800 | $1,500 |
| Diagnostic (WUFI Modeling) | $0 | $500 | $1,500 |
| Total (Est.) | $550 | $4,300 | $7,500 |
The Opportunity Cost: The most expensive mistake is skipping the hydrothermal modeling (WUFI). Spending $1,500 on a simulation to ensure your wall assembly won’t rot is a minor insurance premium compared to a $100,000 structural repair ten years later.
Tools, Strategies, and Support Systems
Executing a high-end vapor vision requires a move from the “staple gun” to “Integrated Adhesion”:
-
Acrylic Pressure-Sensitive Tapes: These are required to seal the seams of the vapor retarder. Standard duct tape will fail within months due to temperature fluctuations.
-
EPDM Gaskets: Used at the “top plate” and “bottom plate” to ensure the vapor retarder is physically clamped to the structure, preventing air-transported moisture.
-
Acoustic Sealant: A non-skinning caulk that remains flexible, used to seal the retarder to electrical boxes and plumbing penetrations.
-
Blower Door Testing: Essential for identifying where “Bulk Air” is bypassing the vapor retarder.
-
Smart Membrane Cutters: Tools that allow for precise cutting without snagging the reinforced fibers of high-end retarders.
-
Putty Pads: Applied to the back of electrical outlets to maintain the integrity of the vapor/air plane.
-
WUFI Software: The industry standard for “Transient Heat and Moisture” simulation.
Risk Landscape: Failure Modes and Compounding Hazards
Vapor management is a “binary” system; a 95% perfect installation can still fail if the 5% error is in a critical location.
-
“The Staple-Hole Syndrome”: Thousands of staples used to secure a barrier create thousands of tiny vapor paths. High-end installs use “cap-staples” or adhesive strips.
-
“The Unsealed Penetration”: A single unsealed wire penetration can allow enough moisture into a wall to saturate the insulation in one heating season through “Air-Coupled Vapor Transport.”
-
“The Inverse Condensation Trap”: In mixed climates, installing a vapor barrier that is too tight on both sides of a wall. This prevents drying in either direction, leading to “trapped moisture.”
-
“The Construction Moisture Hazard”: Closing a wall with a high-class vapor retarder before the “wet” trades (concrete, drywall mud) have dried. This traps gallons of water in the framing.
Governance, Maintenance, and Long-Term Adaptation
A vapor barrier is an “Internal Organ” of the building; once the drywall is up, it cannot be maintained without surgery. Therefore, governance is focused on “Initial Verification.”
-
The “Pre-Drywall Forensic Audit”: Every square inch of the retarder must be inspected. Any tear, gap, or un-taped seam must be remediated.
-
The “Relative Humidity Setpoint”: Occupant behavior is a form of maintenance. If a home is built with a Class II retarder, the interior RH must be governed (usually below 40% in winter) to prevent overwhelming the system’s capacity.
-
Governance Checklist:
-
[ ] Verify all lap joints are taped with acrylic tape.
-
[ ] Audit “boot-seals” at every plumbing penetration.
-
[ ] Ensure the vapor retarder is integrated with the window flashing.
-
[ ] Check for “Sealant Continuity” at the rim joist.
-
Measurement, Tracking, and Evaluation
-
Leading Indicators: “Perm-Inch” calculations based on the specific material thickness.
-
Lagging Indicators: Wood Moisture Content (WMC). Using remote sensors (like OmniSense) embedded in the sheathing to track moisture levels in real-time.
-
Qualitative Signals: The absence of “efflorescence” (white salt deposits) on the interior of foundation walls.
-
Documentation Example: A “Seam Map” showing every taped joint, verified by a third-party building science consultant.
Common Misconceptions and Oversimplifications
-
Myth: “The vapor barrier should always be on the warm side.” Correction: In many climates, “which side is warm” changes with the seasons. A “warm side” barrier can cause rot in the summer.
-
Myth: “Plastic is better because it’s more waterproof.” Correction: Waterproofing is not the goal. Moisture management is the goal. Plastic often prevents the wall from drying.
-
Myth: “My house needs to breathe.” Correction: People need to breathe; houses need to dry. “Breathing” usually refers to uncontrolled air leaks, which are the primary cause of vapor failure.
-
Myth: “Vapor barriers cause mold.” Correction: Misplaced or poorly sealed vapor barriers cause mold. A correctly specified retarder prevents it.
-
Myth: “Tyvek is a vapor barrier.” Correction: Tyvek is a water-resistive barrier (WRB) and an air barrier, but it is highly “vapor-open.” It is the opposite of a vapor barrier.
-
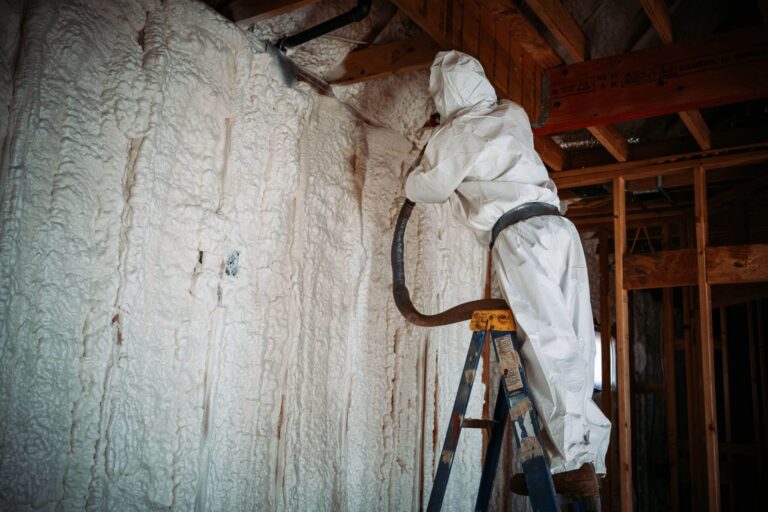
Myth: “If I use spray foam, I don’t need a vapor barrier.” Correction: Only “Closed-Cell” spray foam at a specific thickness (usually 2+ inches) acts as a Class II vapor retarder. Open-cell foam is vapor-permeable.
Ethical, Practical, or Contextual Considerations
The endeavor to manage common vapor barrier installation mistakes is ultimately a pursuit of “Structural Legacy.” We are building homes that are significantly more complex than those of our ancestors. These homes do not have the energy “waste” to dry themselves out. Therefore, we have an ethical obligation to ensure the assemblies we design are “Hydrothermally Safe.” A failure in vapor management is not just a repair issue; it is a waste of the embodied carbon of the entire structure. A house that rots in twenty years is a failure of sustainability, regardless of its R-value or solar panels.
Synthesis: The Future of Hygrothermal Resilience
The trajectory of the global building industry is moving toward “Passive Hygro-Regulation.” We are seeing the rise of bio-based materials like hempcrete and wood fiber, which have “Hygroscopic Mass”—the ability to safely store and release massive amounts of vapor without degradation.
To successfully manage a modern building envelope is to embrace the “Law of Drying.” It is a rejection of the “block-and-seal” mentality in favor of an adaptive approach where the vapor retarder is a dynamic gatekeeper. By prioritizing “Smart Permeability,” “Airtightness,” and “Exterior Insulation,” the builder ensures that the residence remains a stable, filtered, and resilient sanctuary for the life of the asset.