Common Mistakes in DIY Attic Insulation: A Forensic Guide
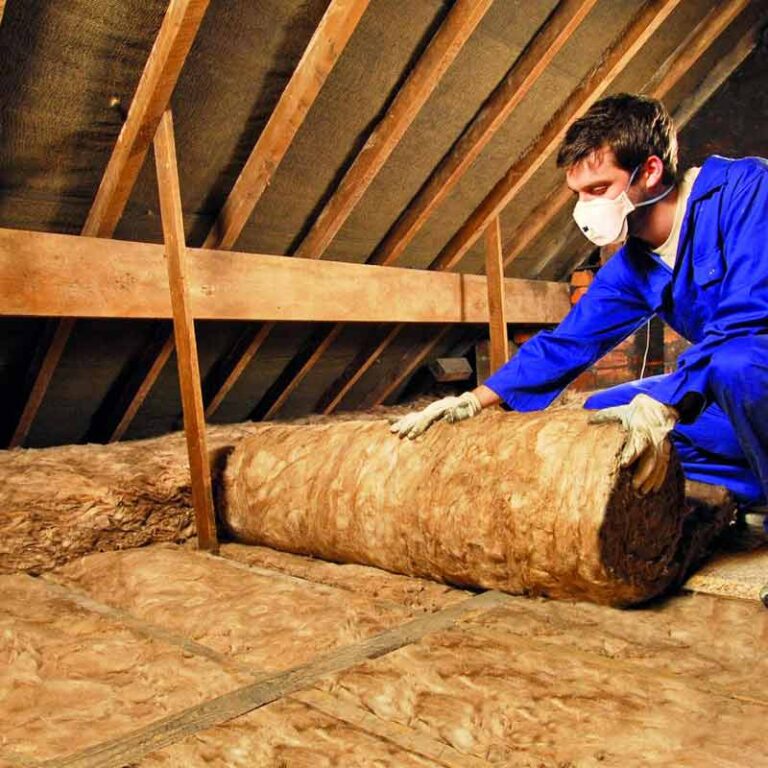
The attic is arguably the most thermodynamically active zone within a residential structure, yet it remains the most misunderstood by the average homeowner. It serves as the primary atmospheric buffer between a climate-controlled living space and the volatile exterior environment. When a DIY enthusiast approaches the task of “topping off” or replacing insulation, the focus is almost exclusively on R-value—the measure of thermal resistance. Common Mistakes in DIY Attic Insulation. However, R-value is a static laboratory metric that assumes a perfectly sealed, dry, and immobile environment. In a real-world attic, heat transfer is a dynamic interplay of conduction, convection, and radiation, complicated further by the movement of moisture-laden air.
Architectural stewardship requires a departure from the “more is better” philosophy toward a rigorous understanding of building science. A well-insulated attic is not merely a layer of fiberglass or cellulose; it is a system that includes air barrier continuity, moisture management, and ventilation balance. When these variables are ignored, the introduction of high-performance insulation can actually accelerate the degradation of the roof deck and the growth of microbial life. The irony of many energy-saving initiatives is that without forensic attention to detail, they create “High-Performance Failures”—homes that are thermally efficient but structurally compromised.
This study provides a definitive framework for navigating the technical complexities of residential thermal boundaries. We move beyond surface-level “how-to” guides to analyze the systemic drivers of heat loss and the unintended consequences of improper installation. By dismantling the mechanics of stack effect, vapor diffusion, and ice damming, we establish a rigorous methodology for residential energy management. This is an examination of how to protect a building’s envelope from the entropic forces of seasonal change, ensuring that the thermal boundary remains an asset rather than a liability.
Understanding “common mistakes in DIY attic insulation”
In the professional building science community, the challenge of identifying common mistakes in DIY attic insulation is regarded as an exercise in “Whole-House Integration.” It is a multi-perspective problem that requires balancing thermal resistance with the house’s need to shed moisture. A common misunderstanding among DIYers is the belief that insulation’s primary job is to stop air. In reality, most common insulation materials (fiberglass and cellulose) are “Air-Open.” They stop heat conduction but do nothing to stop air convection. Mistakenly treating insulation as an air sealer is the fundamental error that leads to wasted capital and persistent drafts.
Oversimplification risks are highest during the material selection phase. A homeowner might purchase several dozen batts of fiberglass, thinking they are improving the home, only to create “Thermal Bypasses”—small gaps around wires, pipes, and light fixtures where warm air bypasses the insulation entirely. Effectively determining the landscape of common mistakes in DIY attic insulation requires a calculation of “Effective R-value.” If 5% of the attic floor is uninsulated due to gaps around joists or bypasses, the effective R-value of the entire attic can drop by as much as 30% to 50% because the attic behaves like a thermal chimney.
Furthermore, a sophisticated understanding of these errors must address “Ventilation Obstruction.” Attics are designed to breathe; air enters through the soffits and exits through the ridge or gable vents. A frequent and costly error occurs when insulation is pushed into the eaves, blocking the soffit vents. This creates a stagnant, warm environment that melts snow on the roof—leading to ice dams—and traps humidity against the roof deck, leading to wood rot. Mastering this landscape involves an analytical focus on the “Baffle,” the air-sealing foam, and the insulation as a unified, three-part system.
The Systemic Evolution of the Attic Environment
The history of the American attic has transitioned from “Passive Storage” to “Sealed Thermal Barrier.” In the pre-1950s era, homes were built to be “leaky.” Heat was cheap, and air movement was the primary method of preventing moisture buildup. Attics were drafty by design. As energy costs rose and building codes tightened, the focus shifted toward “Tightness.” However, this shift created a new set of problems: moisture that once escaped through drafts was now trapped in the building’s lungs.
The “Modern Era” of attic management is defined by the “Alignment of the Thermal and Pressure Boundaries.” We have moved from a reliance on thick blankets of wool or fiberglass to a precision-engineered approach that prioritizes “Air Sealing” before “Insulating.” This evolution reflects a move from treating insulation as a standalone product to treating the attic as a critical component of the building’s mechanical system. The DIYer who ignores this evolution is applying 1940s logic to a 2020s building envelope.
Conceptual Frameworks and Mental Models
To evaluate attic performance with editorial and engineering rigor, professionals utilize specific mental models:
-
The “Stack Effect” Framework: This model treats the house as a giant straw. In winter, warm air rises and escapes through attic leaks, creating a vacuum that pulls cold air in through the basement. Insulation without air sealing only filters the air; it doesn’t stop the straw from drawing.
-
The “Dew Point” Matrix: This focuses on where warm, moist air meets a cold surface. The goal of insulation is to ensure that the dew point (the temperature at which water vapor turns to liquid) occurs within the insulation or outside the house, never on the structural wood.
-
The “Thermal Bridge” Model: This assumes that wooden joists are highways for heat. Even if you have thick insulation between the joists, the joists themselves conduct heat. Advanced DIYers use “Cross-Batting” or “Blown-in Overfill” to cover the wood and break the bridge.
Material Categories and Performance Trade-offs
The residential market utilizes a diverse range of materials, each with a unique “Vulnerability Profile.”
Comparative Taxonomy of Attic Insulation
| Material Type | R-Value per Inch | Air Sealing Ability | Moisture Sensitivity | Primary DIY Risk |
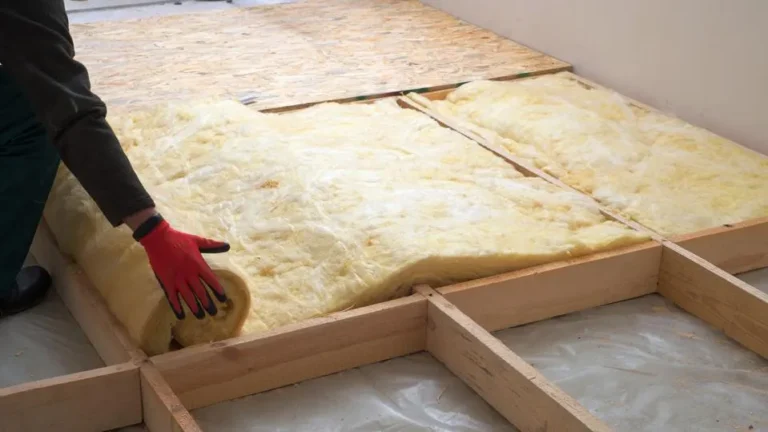
| Fiberglass Batts | 2.9 – 3.8 | None | High (Loses R-value) | Gaps and Voids |
| Blown Cellulose | 3.2 – 3.8 | Minimal (Dense pack) | Low (Borate treated) | Over-compression |
| Mineral Wool | 3.0 – 3.3 | None | Very Low (Hydrophobic) | Weight on drywall |
| Rigid Foam Board | 3.8 – 6.5 | High (If taped) | None | Difficult to fit |
| Spray Foam (DIY) | 3.5 – 7.0 | Highest | None | Off-gassing/Mixing |
Realistic Decision Logic
The decision on which material to specify must be “Stress-Tested” against the attic’s current condition. For a standard, unfinished attic floor, Blown Cellulose is the preferred DIY choice because it conforms to irregular shapes and fills small gaps better than batts. However, if the attic is used for storage and has a floor, Rigid Foam installed over the joists may be necessary. The logic favors materials that eliminate “Human Error” in fitting; a hand-cut fiberglass batt is rarely cut perfectly, whereas blown insulation flows like a liquid to fill the “insulation-to-wood” interface.
Detailed Real-World Scenarios and Decision Logic Common Mistakes in DIY Attic Insulation
Scenario A: The 1970s Cape Cod (Inadequate Air Sealing)
-
The Challenge: Homeowner adds 12 inches of new fiberglass over old insulation but the house remains cold and the heating bill stays high.
-
The Error: Ignoring the “Top Plates” (where walls meet the attic floor).
-
The Failure: Warm air is escaping from the walls into the attic, passing through the new fiberglass like a ghost.
-
The Solution: Remove old insulation, spray foam the top plates and wire penetrations, then reinstall insulation.
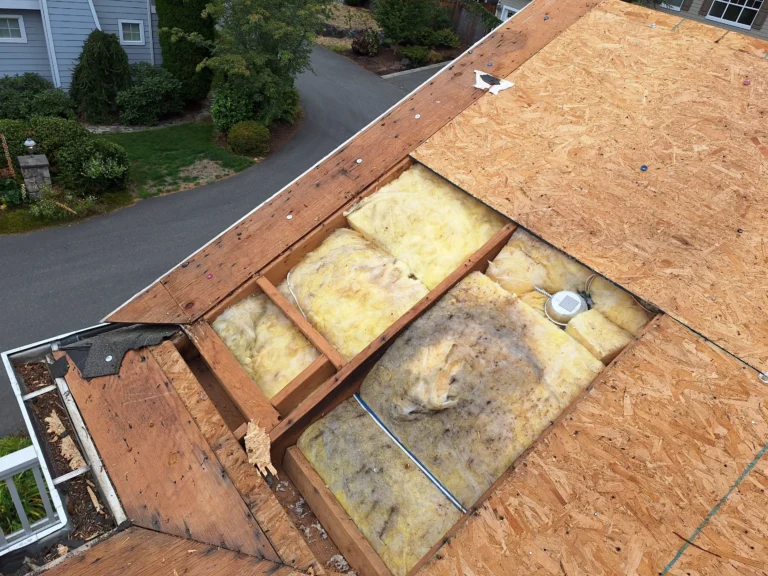
Scenario B: The Over-Insulated Eaves (Moisture Failure)
-
The Challenge: Homeowner blows 20 inches of cellulose into every corner, including the very edges of the roof.
-
The Error: Blocking the soffit vents.
-
The Failure: Within two winters, the plywood roof deck is covered in black mold because there is no cross-ventilation to remove the humidity.
-
The Solution: Install “Soffit Baffles” (styrofoam channels) before insulating to preserve a 2-inch air gap for the roof deck.
Planning, Cost Architecture, and Resource Dynamics
The economic profile of attic insulation is defined by “The 20/80 Rule.” Generally, the material accounts for 80% of the DIY cost, but the 20% of the work spent on “Prep” (air sealing) generates 80% of the savings.
Range-Based Resource Allocation (Per 1,000 Sq. Ft. Attic)
| Component | Standard Batt DIY | Blown Cellulose DIY | Professional Spray Foam |
| Material Cost | $800 – $1,200 | $600 – $1,000 | $2,500 – $4,500 |
| Air Sealing Prep | $100 – $300 | $150 – $400 | Included |
| Equipment Rental | $0 | $0 – $100 (Often free) | N/A |
| Labor (Self) | 20 – 30 Hours | 8 – 12 Hours | N/A |
| Total (Est.) | $900 – $1,500 | $750 – $1,500 | $2,500 – $4,500 |
The Variability Factor: The “Hidden Cost” of DIY is the discovery of existing damage. If an attic has old vermiculite insulation (potential asbestos) or knob-and-tube wiring, the DIY project instantly shifts into a professional remediation project. Ignoring these factors to save money is a primary driver of long-term property liability.
Tools, Strategies, and Support Systems
Executing a high-performance insulation project requires moving from “General Construction” to “Thermal Engineering”:
-
Canned Spray Foam (Great Stuff): For sealing small wire holes.
-
Large-Gap Foam or Fire-Rated Caulk: Essential for sealing around chimneys and furnace flues.
-
Soffit Baffles: Pre-formed plastic or foam channels to prevent vent blockage.
-
Recessed Light Covers: Fire-safe boxes that allow you to insulate over “can” lights without creating a fire hazard.
-
Thermal Imaging Camera (Rental): The ultimate tool for finding “hot spots” where air is leaking through the insulation after the job is done.
-
Headlamp and Respirator (N95/P100): Essential for safety in dark, particulate-heavy environments.
-
Walking Boards: Plywood sheets placed across joists to prevent the homeowner from stepping through the ceiling drywall.
Risk Landscape and Failure Modes
The management of a thermal boundary is a path littered with “Compounding Failures.”
-
“The Fire Trap”: Covering old knob-and-tube wiring with cellulose. This wiring requires air space to dissipate heat; when buried, it can overheat and ignite the insulation.
-
“The Attic Hatch Leak”: Insulating the entire attic but leaving the access hatch as a bare piece of plywood. This is equivalent to leaving a window open all winter.
-
“The Vapor Barrier Reversal”: Installing paper-faced batts with the paper facing up in a cold climate. This traps moisture between the paper and the drywall, rotting the ceiling.
Governance, Maintenance, and Long-Term Adaptation
A thermal envelope is not a “set-and-forget” system. It requires a monitoring cycle.
-
The Annual “Roof-Line” Check: Every winter, look at your roof after a light snow. If the snow melts in specific spots but stays in others, you have a thermal bypass that needs more sealing.
-
The “Humidity Audit”: Use a hygrometer in the attic. If humidity exceeds 60% in winter, your ventilation is failing.
-
Governance Checklist:
-
[ ] Ensure the attic hatch is weather-stripped and weighted down.
-
[ ] Verify that bathroom exhaust fans vent outside, not into the attic insulation.
-
[ ] Check baffles to ensure they haven’t shifted or been crushed by wind.
-
Measurement, Tracking, and Evaluation
-
Leading Indicators: Changes in “Blower Door Test” numbers before and after air sealing.
-
Lagging Indicators: A reduction in therms (gas) or kWh (electric) used for heating, adjusted for “Heating Degree Days.”
-
Documentation Example: A “Thermal Map” created with an infrared camera after installation, documenting that the joist-to-insulation interface is consistent across the entire floor.
Common Misconceptions and Oversimplifications
-
Myth: “Insulation stops drafts.” Correction: Insulation filters air; it does not stop it. You must seal the holes with foam or caulk first.
-
Myth: “You can never have too much insulation.” Correction: Once you reach R-60, the law of diminishing returns makes further additions financially illogical.
-
Myth: “Fiberglass is waterproof.” Correction: Fiberglass loses its R-value when wet and becomes a breeding ground for mold.
-
Myth: “I don’t need to seal the attic if I’m just adding more on top.” Correction: Adding more insulation over a leak is like putting a thicker sweater on over a hole in your chest—it doesn’t stop the wind.
-
Myth: “Attics should be hot in the summer.” Correction: A properly ventilated attic should be within 10–20 degrees of the exterior temperature.
Synthesis: The Future of Residential Insulation
The trajectory of the insulation industry is moving toward “Encapsulated Envelopes.” We are seeing a move away from the “Vented Attic” toward the “Conditioned Attic,” where the insulation is applied to the underside of the roof deck rather than the floor. This brings the attic (and the HVAC ducts usually found there) inside the thermal envelope of the house.
While this represents the high-end future, the core principles for the DIYer remain constant: Seal first, Insulate second, and Ventilate always. To avoid common mistakes in DIY attic insulation is to acknowledge that the house is a living, breathing machine. Preservation is not about packing the attic tight; it is about respecting the physics of air and moisture. By applying forensic measurement and prioritizing air-barrier continuity, the homeowner ensures that their energy-saving investment doesn’t become a structural liability.